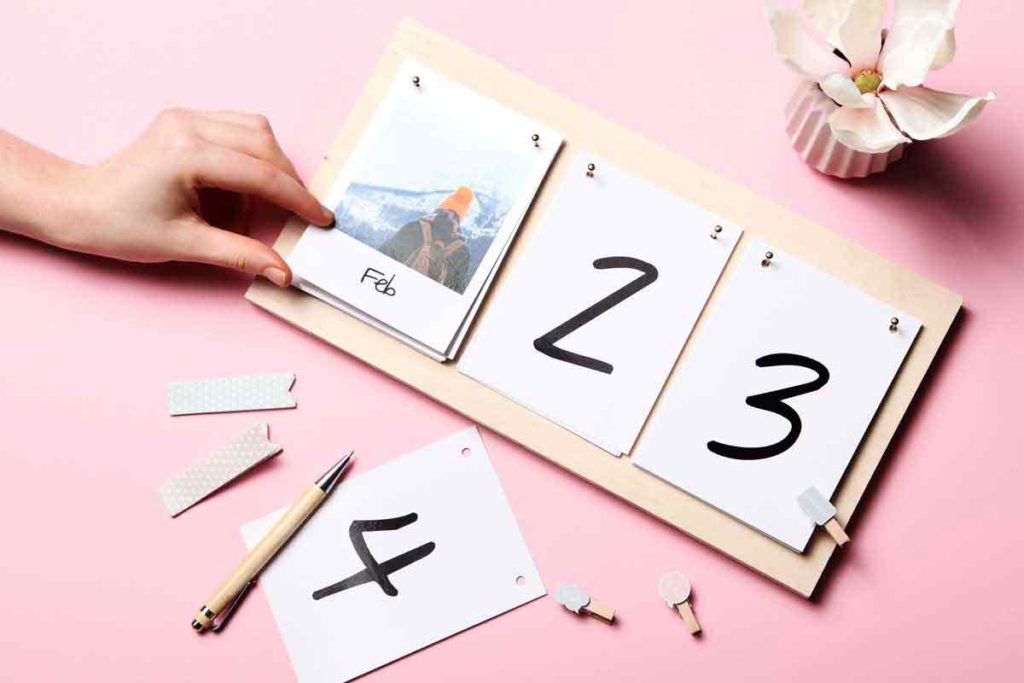
Do you love a DIY Photo Calendar that use your own photos as much as I do? Then you’ve come to the right place, because today we’re going to make a completely customized and unique desktop calendar that’ll be the center of attention for any style of décor. And the best part? You most likely already have all the necessary tools at home and can get started on this easy 5-minute project right away.
DIY Photo Calendar – Step 1
Supplies

It is worth taking a look through your toolbox for these. You’ll probably be able to find 6 small nails (I used 25-mm gold nails) and a hammer. You also need a wooden board. I was able to get rejects from a home-improvement store for just a couple of cents. A hole-puncher for mounting and your favorite photos. Got everything? Then we’re ready to start!
DIY Photo Calendar – Step 2
Time for your fondest memories

Obviously, the pages are the most important part of the DIY calendar. You need to print out twelve beautiful photos for the pages of the month. I’ve chosen a mix of evocative nature photos for each month and personal memories from the respective season, then inscribed the names of the months using my very best handwriting. But it’s your project; unleash your creativity!
On top of that, your DIY calendar also needs dates. It requires: the numerals 0-3 (2 of each), the digits 4 to 9 (1 of each). But where can you have them printed on stiff, high-quality paper? In the MyPostcard Shop, of course.
DIY Photo Calendar – Step 3
Mounting: so easy

Grab your hole-puncher and punch your photos. You can also position just one hole in the middle of the images; this reduces the number of nails required to three. I find the 2-hole version to be more stable, though, because it’s harder for the photos to fall off the nails.
DIY Photo Calendar – Step 4
Everything ready?!

You should have the following things in front of you: a hammer, 6 small nails, the pages of the calendar (with precisely positioned holes), and the wooden board. Because the calendar pages are roughly 10 by 15 cm and you need three rows for the DIY calendar, the board should be at least 50 cm long and 15 cm high. As always: We’re not looking for perfection, but the photos still ought to fit on the wooden board in an aesthetically pleasing arrangement.
I’ve divided the calendar pages into three stacks. The first pile contains the twelve month pages with your photos; the second, the four numerals: 0, 1, 2, 3. The leftover numerals make up the last pile.
DIY Photo Calendar – Step 5
Handcrafting skills required

Obviously, you can calculate, measure, and position the nails perfectly if you want, but our mini tutorials are all about eyeballing and getting things done quickly. So lay out the three stacks in their positions, straighten them until they’re aligned and evenly spaced, and mark the perforations lightly. Now you know where to place the nails. The final and most important tip: be careful with your fingers!
All that’s left is assembling your photos and numerals on the little wooden board with 6 nails. Look, your own DIY calendar is already finished. That was easy enough, right? You can also (spray-)paint your desktop calendar to give it some color. But I like the personalized natural-wood look the best.
Have fun with recreating this little and super easy DIY project.
Lots of love,
Nadja from the MyPostcard Team


Comments are closed.