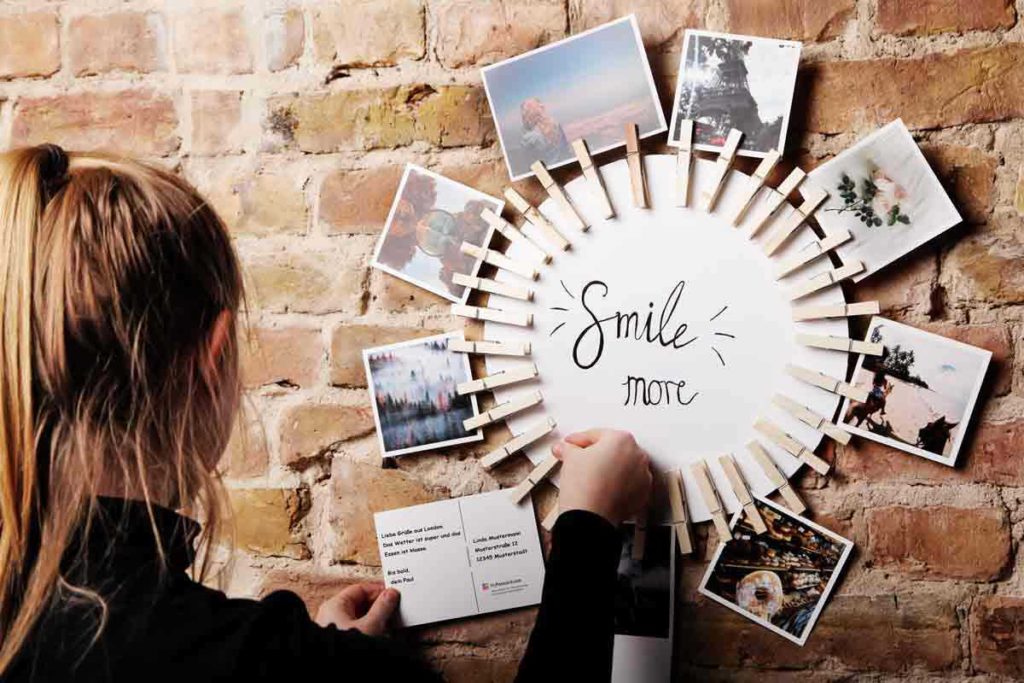
Welcome to my simple picture frames tutorial for today; lovely to see you again. I’m sure you’ve had this problem: you have great photos, postcards and other pictures, but they’re all in different formats and sizes. Isn’t it such a pain when you can’t find a pretty frame to fit your photos? A real shame, because your pictures and postcards deserve to be hung up in a unique way that fits them! But no worries… In 5 minutes, I’ll show you how to showcase your pictures perfectly. Let’s get started!
Simple picture frames – Step 1
6 Things you need

You don’t need much at all in the way of tools and crafts supplies; you can improvise. Stiff cardboard in your favorite color (make sure that the color doesn’t clash with the area where you want to hang your photo holder!), looots of retro wooden clothespins, a pen, glue and scissors. You’ll also need a compass. If you were like me and maybe cut class once or twice, then I’ll tell you about two super easy tricks: either use a big plate to help you and draw around the edge, or tie a thread and pencil to a pushpin and use them to draw a circle as evenly as possible…OK, OK, I’ll go through it again more slowly in the next step.
Simple picture frames – Step 2
The right shape for the picture holder

Got a compass? Perfect, then draw a circle with a radius that’s as big as possible. I’ve got an easy fix for all of you who need a Plan B to draw a neat circle: just take a pushpin and a ribbon of about 20 cm in length. Tie it to the pin. Attach the pencil to the thread and pull it taut, then draw a circle as evenly as you can…and voilà!

Simple picture frames – Step 3
Give the picture holder a message

What’s your DIY picture frame’s theme? Want to clip on the best photos and postcards from your last trip? Then write the place where you went on vacation and the date in the middle of the circle. Want to pin up the most romantic moments you’ve spent with your sweetheart? Decorate the picture holder with the date you two met. Or to be particularly inspiring: Motivational phrases that are sure to bring a smile to your face every day. Make sure to write in the middle and leave about 5 cm from the edge free; this is where the clothespins will go.
Simple picture frames – Step 4
Attach the pins

You should have your beautifully lettered shape in front of you. Because you’ve left enough room at the edge (around 5 cm), you can now stick on the clothespins with glue. It’s easiest to start with a simple arrangement – attach one pin at 3, 6, 9, and 12 o’clock. Now you have something to orient yourself with and can attach the rest of the clips one by one. The number of clothespins you use is up to you. Want things a little more colorful? No problem, just color in the clothespins with felt-tip markers, or spray paint them.
Simple picture frames – Step 5
Showcase your photos and postcards

After letting it dry for around 5 minutes, your DIY picture holder is ready for action and can be loaded up with your pictures and images. The great thing about this DIY project is that you can pin up pictures in any format imaginable. Any idea where you can get your photos and postcards printed? At MyPostcard, of course – why not take a gander at our shop and let yourself be inspired?
It’s as easy as that: you’ve made your own totally personal picture holder for your photos and postcards. If you’re as happy with the result of your DIY project as I am, then show it off to your friends on Facebook and other social media.
Have fun crafting! See you next time.
Love, Nadja from MyPostcard.


Comments are closed.