

By Melody Peralta
Ever since I was a young, birthdays to me have always been special. Whether I had a large birthday party, or had a more laid-back event, I’ve always felt that each trip around the sun needed to be celebrated, and commemorated! My parents always made sure that we felt special on our birthdays, and I’ve carried on that tradition through my adult years. Though my birthday celebrations are now, more often than not, very low-key, cake is always a requirement!
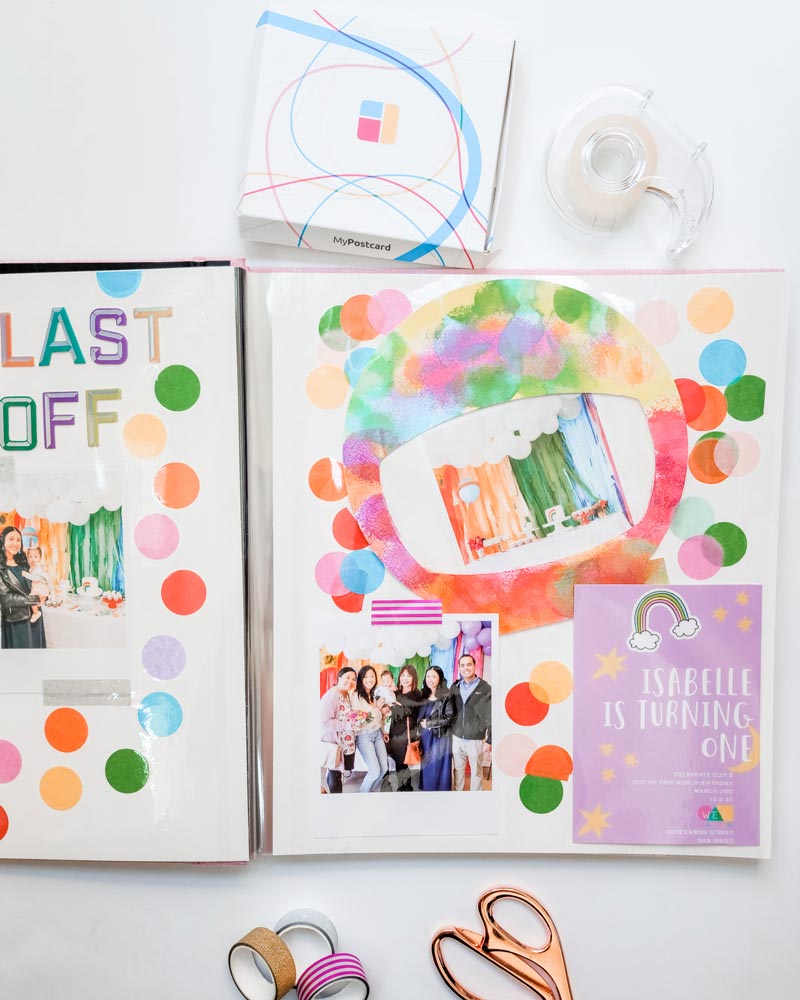
Now that I have my own children, I’ve really enjoyed planning and carrying out their birthday celebrations. As someone who finds every reason to throw a little party, my collection of party goods has grown. So much work goes into party-planning, from the decorations, to the food, venue, etc. I thought it would be a great idea to remember all these special birthdays by combining photos and elements from each celebration into a scrapbook! MyPostcard photo prints worked perfectly to give a uniform look to each page. I also reprinted copies of each birthday event invitation using MyPostcard Photo Postcards. Make sure you order the postcards with an envelope, so they arrive in good condition!
Here what you will need to create your own birthday scrapbook…
Materials
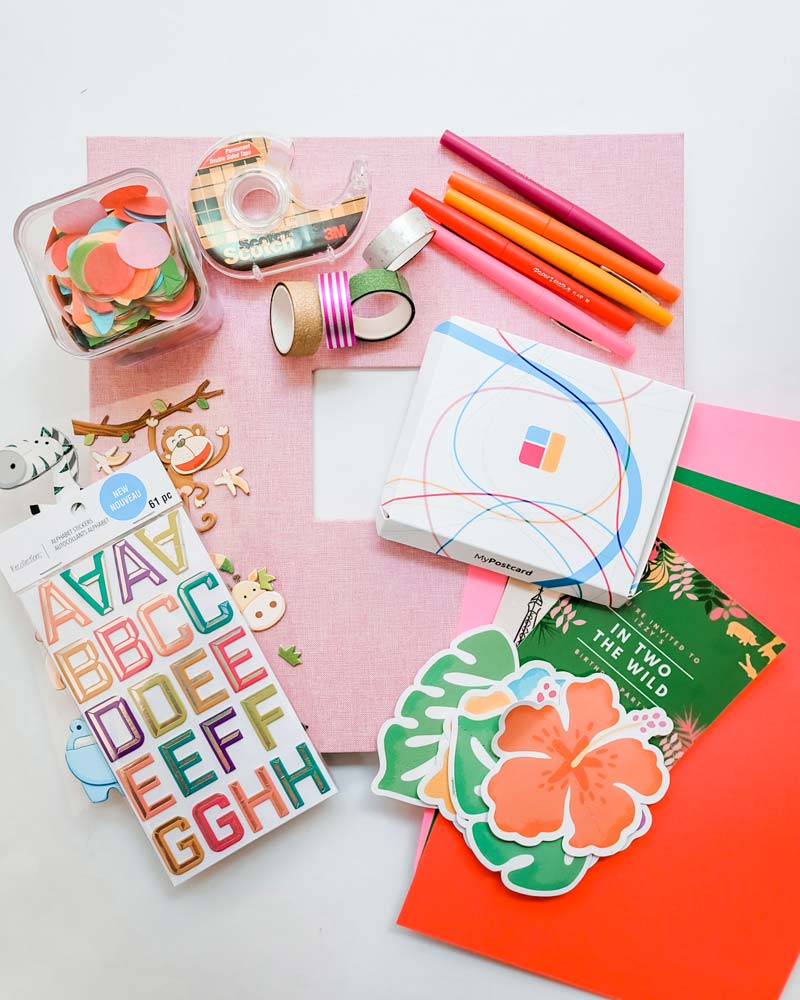
- MyPostcard photo prints in ‘Instant’ size (3.9 x 5.1 IN)
- MyPostcard photo postcards (send in envelope)
- Large self-adhesive photo album (with clear film cover on each page)
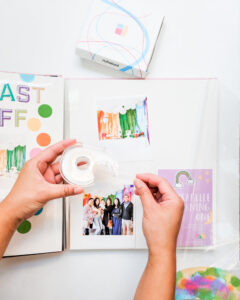
- Double stick tape
- Decorative stickers/ Letter stickers
- Party elements that can lay flat (for example: confetti, napkins, paper decor, etc.)
- Optional materials: Vinyl cutting machine (and accessories) to personalize the cover, decorative colored pens to caption photos, card stock to add page contrast in the background, washi tape
Directions
Step 1
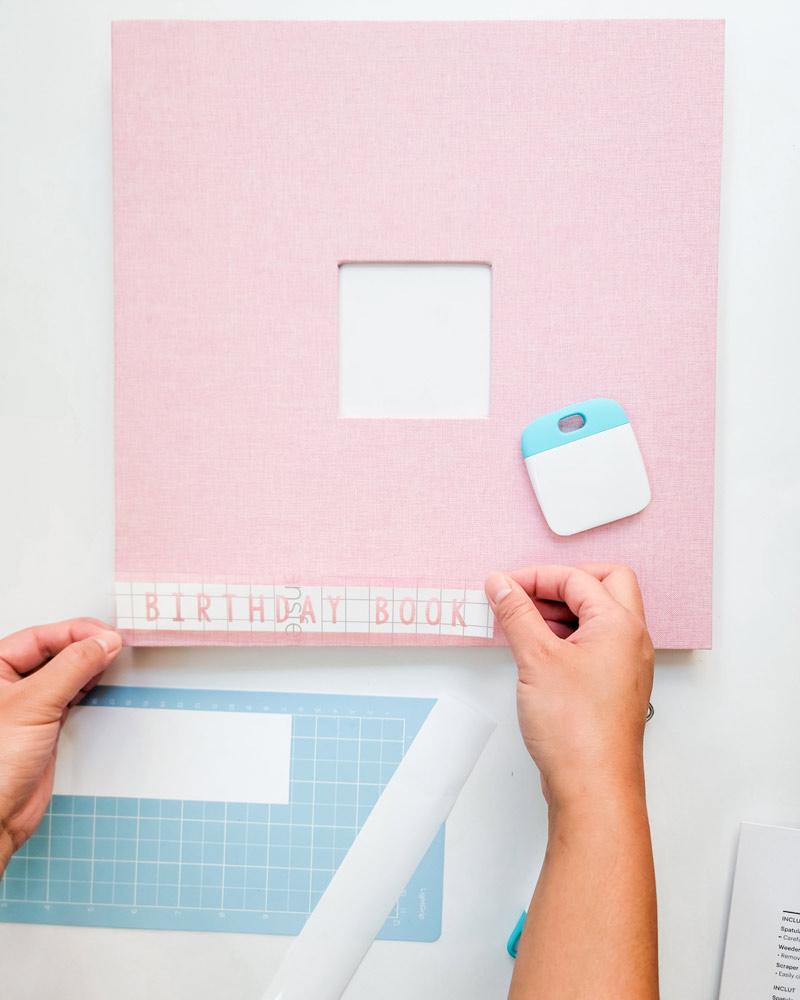
Use a Cricut or another vinyl cutting machine to personalize the front of the birthday scrapbook. Suggestions: Person’s name or initials, date of birth.
[If you’re not using a vinyl cutting machine you can personalize the cover using other mediums such as puffy paint, acrylic paint, stickers, stencils etc. It will also depend on the material of the cover, the photo album I used had a cloth hard cover and can be found here.]
Step 2
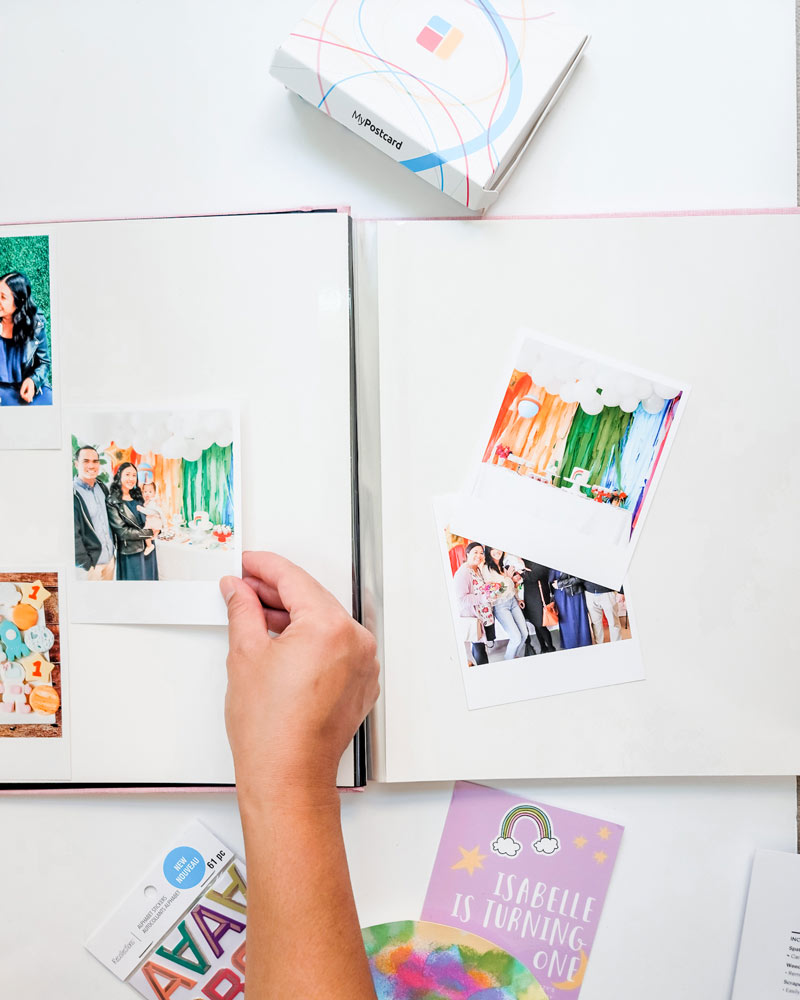
Split photos up between pages. For my project, I used three photos per page to space them out and allow for decorative elements as well.
Step 3
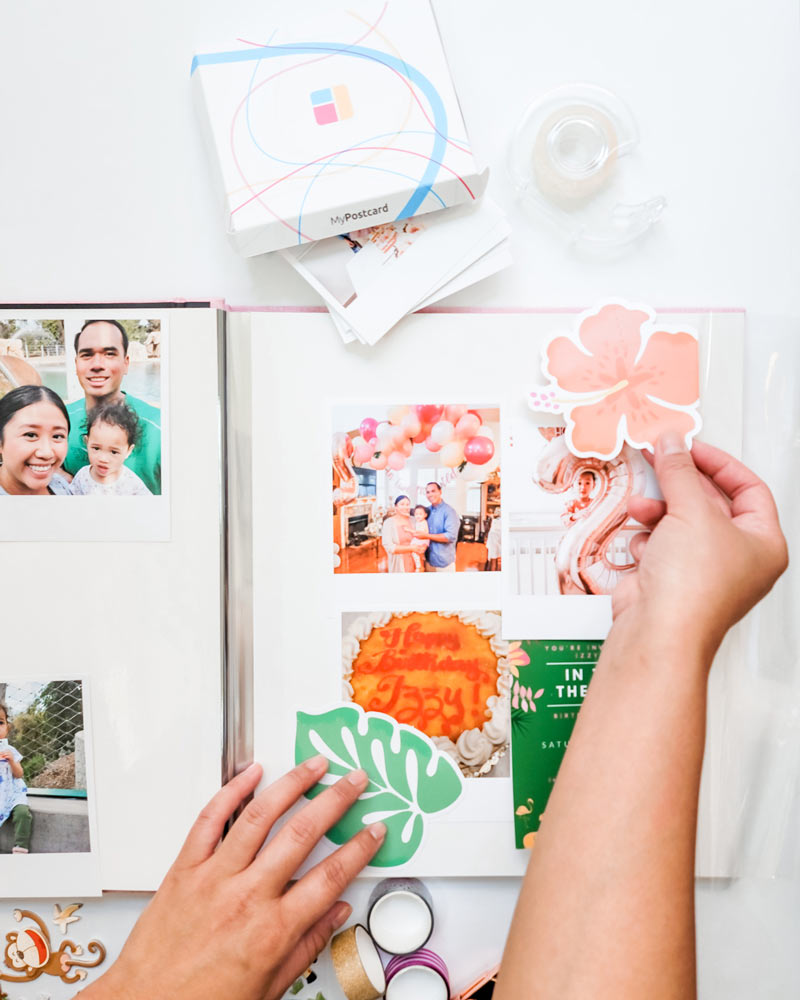
First, loosely lay out where you want each picture to go, including each invitation. Then begin experimenting with placing the decorative party elements such as confetti, napkins, ticket stubs, event bracelets, etc. (Remember that the elements should be able to lay flat or else the scrapbook pages may become bulky).
Step 4
Step 4a 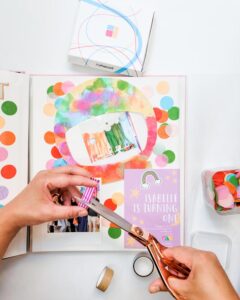
Step 4b

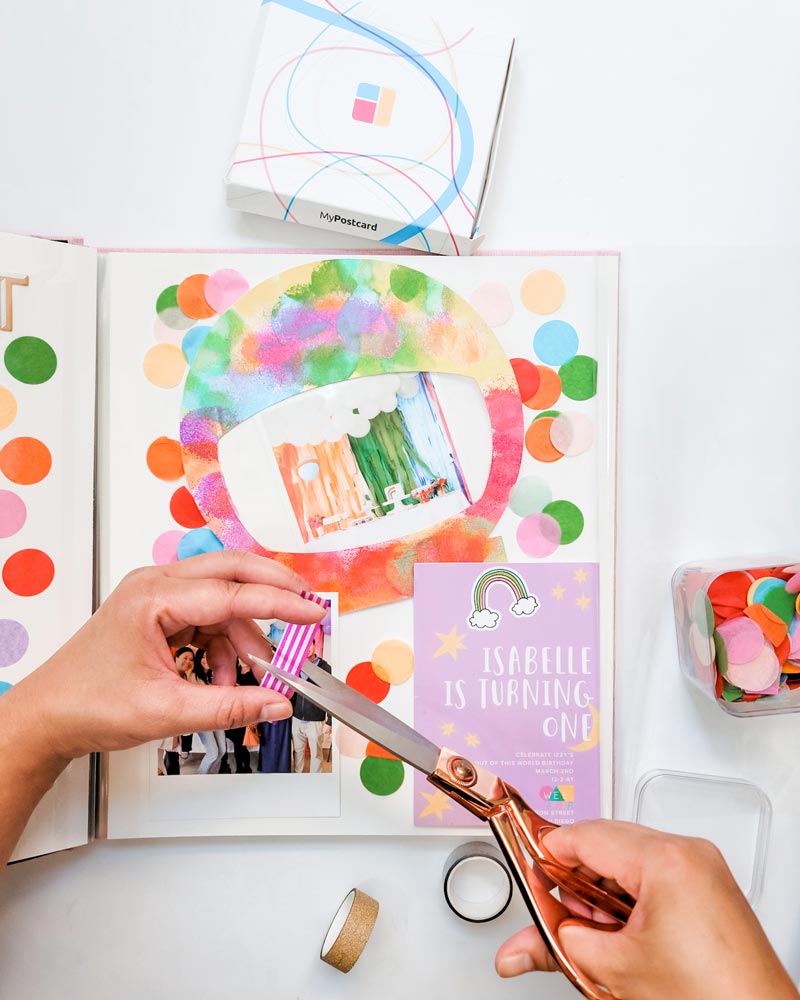
Once you have a page laid out the way you want, use double stick tape to adhere photo prints and large flat items onto the page.
Step 5
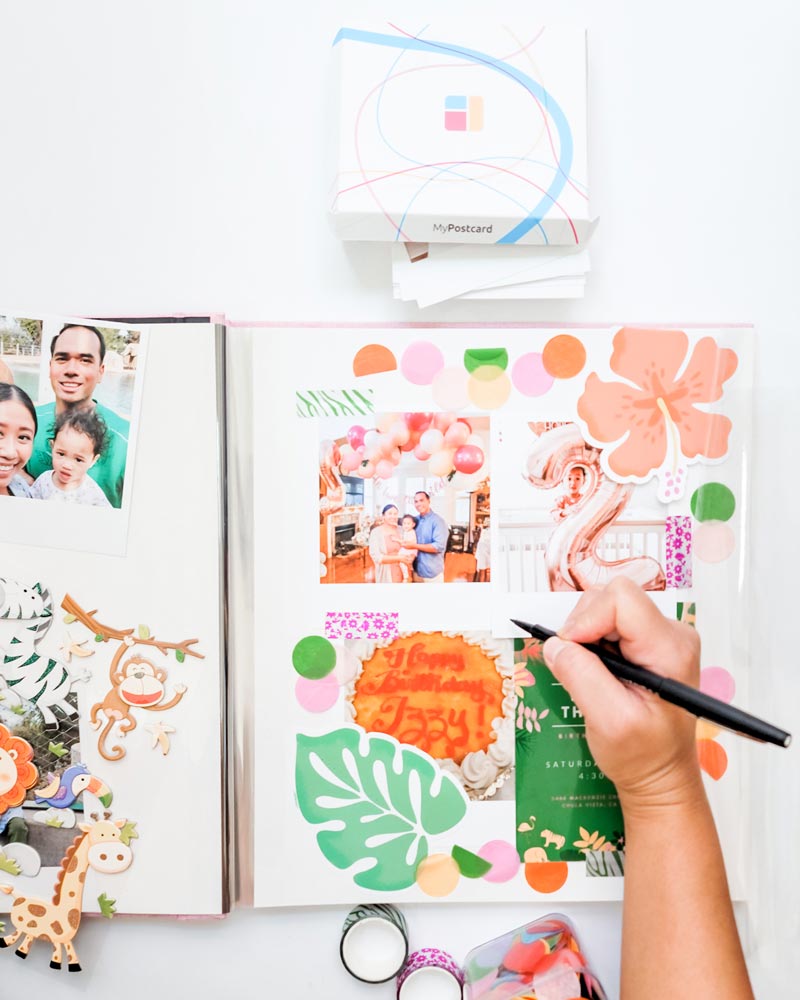
Optional: Add captions, dates, names etc. at the bottom of the photo prints using colored flair pens. It’s a good way to remember what was going on in each photo. Replace the photo album film on each adhesive page to seal.
This photo scrapbook also works with more low-key birthday celebrations, not just parties. For example, my daughter’s second birthday was spent eating a nice lunch with family and going to the zoo. I created her event invitation using a design app, and printed it using MyPostcard photo postcards with details of the day (even though technically no physical invitations were sent out at the time). For her decorative elements, I used animal stickers, and had saved the tickets from our day at the zoo.
My hope is to give each of my children their own birthday scrapbook when they’re older to continue themselves into their adulthood. Another thing my parents always made sure of on birthdays was to always capture a picture to commemorate another year. MyPostcard App makes it so easy to print these photo memories and have them ready for DIY projects such as this!
Are you a fan of celebrating birthdays?
About the author
Melody is a holiday-loving, DIY & craft-making, motherhood, and lifestyle influencer from Southern California. She’s also a military spouse, an elementary school teacher, and has an energetic toddler named Izzy and a baby boy named Max. In her free time, she enjoys cooking, party planning, and dabbling in home decorating. Follow along for more crafting fun on Melody’s Instagram, @melodyinthemaking!
All images on this page are credited to Melody Peralta.
Comments are closed.